Supercharging WordPress Website Speed With Free CDN + Plugin

Website speed can either make or break your web visitors good user experience.
Let’s pause for a moment and put yourself in the visitors’ shoes…
When you browsing through various websites, which one your prefer? Slow or fast?
I think you’ll quickly raise both hands and say “YES” to fast loading websites but say a big “NO” to those with tortoise speed.
This is exactly what your visitors want to expect from your websites in terms of the speed.
They can be quite unforgiving when landed on a slow moving website…
…and most likely never come back to visit it again.
The reason being – no one loves waiting “endlessly” just for a page to load while there are tonnes of other websites available to choose from.
You have 1 chance to leave a deep good first impression in your visitors’ mind, don’t waste it. Possibly, make your website speed as fast as the bullet train.
Both of you and your visitors are going to have happy moments…
…your visitors will have good user experience.
…you will have lots of people loves visiting your website.
Things You Should Know About WordPress
Undeniably, WordPress is one of the best platform for building a professional and nice looking website without having the programming knowledge.
It is widely used to power up lots of websites across the world due to its flexibility in having different types of themes to create different outlook appearance and plugins to extend its functionality.
However, it does suffer a few flaws and slow website speed is just one of them.
Many WordPress-based website owners are suffering from this issue, including myself.
Want to hear my story?
Good, let’s go.
Back then, I was quite disappointed with my own WordPress website speed, as it just super slow loading especially on images when compared to other websites.
I felt it’s really sucks. Even myself also gets annoyed by its speed.
So, I was looking all over the place to find the solution for this “annoying” obstacle.
I decided to upgrade my hosting subscription plan from normal shared hosting to cloud shared hosting offered by Hostgator.
The upgrade does provide the advantages of having 2 additional servers working together to serve the website contents as compared to single server in normal shared hosting environment.
This would help protect the website from totally down when 1 server is breakdown. But for the loading speed, honestly I couldn’t really see too much improvements.
I guessed there must be a much better way to improve the website speed.
Lo and behold…
I Found Effective Way To Supercharge Website Speed
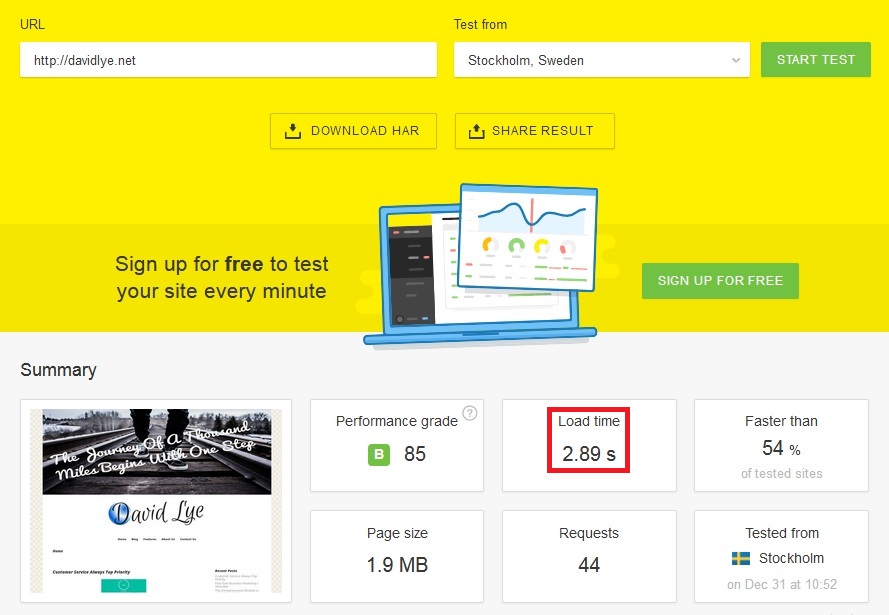
This is the results of my website loading speed before and after going through the supercharging process.
Before speed up – the load time was 2.89 seconds
After speed up – the load time was 1.94 seconds
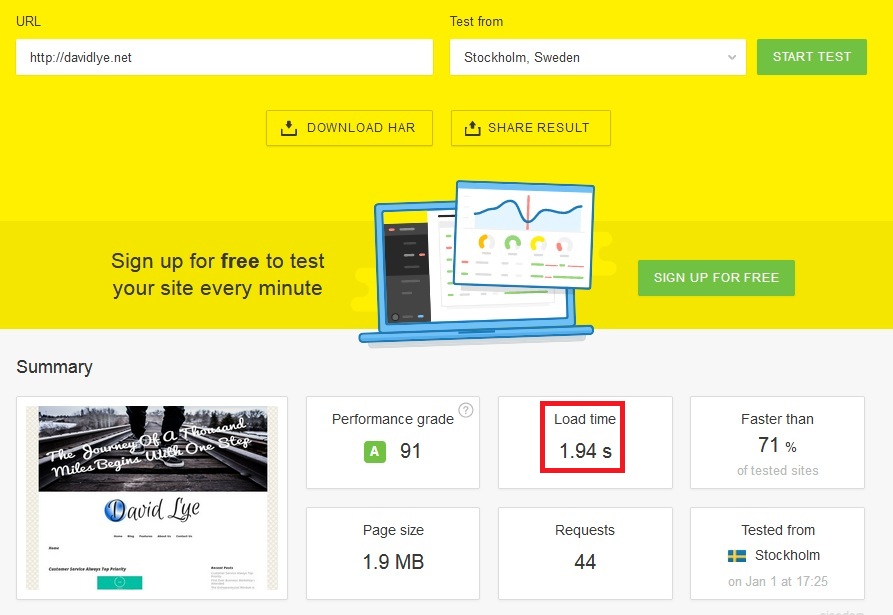
See the difference? The load time has decreased from 2.89 seconds to 1.94 seconds as visible in the website speed testing tool, Pingdom which I tested using the same location (Stockholm, Sweden) and same website page.
The number may looks good, but do you know what makes it even sweeter? It is when I look at my own website and can see the huge difference in the contents loading time.
Now I feel good whenever I browsing through my website. It is way much smoother and enjoyable compared to the original speed.
I have come a long way before I finally found the secrets of how to speeding up my WordPress.
But today, you’re in for a treat…
I’m going to show you how you can use the exact same powerful method HOW you can improve your website speed without wasting time on methods that are not effective.
Ready to take on the exciting journey?
Let’s Get Started
Speeding up your WordPress website is no longer a dream after today when you follow through the steps carefully I am going to reveal in the rest of this post.
You might be thinking it’s going to be an uphill task. But don’t worry, I’ll make the steps as simple as possible so that your head won’t go spinning.
You’ll only need to setup 2 components and you’re on the way of having a fast loading website speed that everyone love.
Component #1: Caching Plugin
Caching is a process of speeding up the website by serving the static files rather than the dynamically rendered contents in your WordPress.
This is going to reduce the amount of work your hosting server need to do, hence using less resources and can deliver your content at much faster rate.
You can achieve this goal just by simply installing the caching plugin to your WordPress.
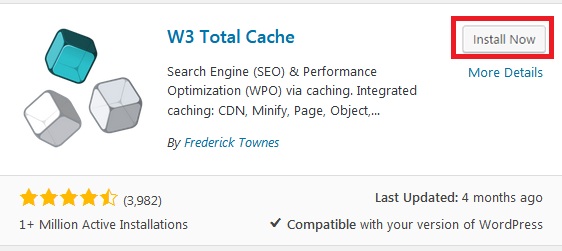
In this post, we’re going to install W3 Total Cache plugin which is going to work effectively with the Component #2 I’m going to introduce soon.
The best part, it’s available to use for free.
How To Set Up And Configure W3 Total Cache
Step #1: Getting W3 Total Cache Plugin Ready For Your WordPress
In your WordPress dashboard, head on over Plugins -> Add New and search for “W3 Total Cache”. Once found, proceed to install and activate it.
Step #2: Configure General Settings
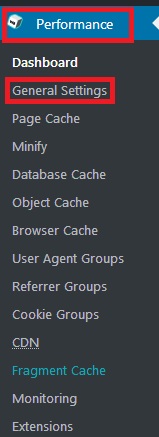
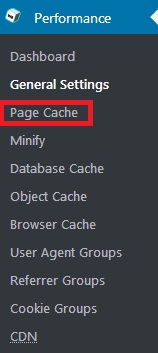
Find and click on “Performance” tab located at the dashboard left menu list. The first move is to configure W3 Total Cache’s General Settings.
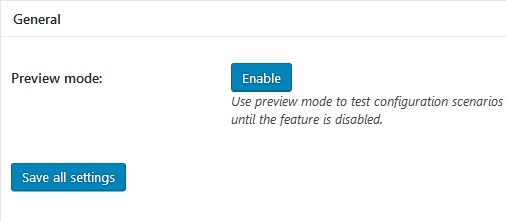
1. General
You can leave the settings here as default as you don’t really need to use the “Preview” mode option.
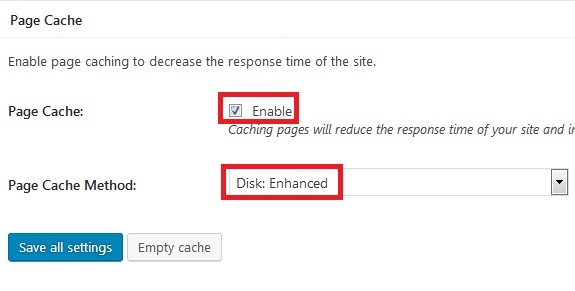
2. Page Cache – Enable
This option is one of the most important feature in W3 Total Cache. It has huge impact in improving your website performance. So, you must Enable “Page Cache” and for the method, just select “Disk: Enhanced”.
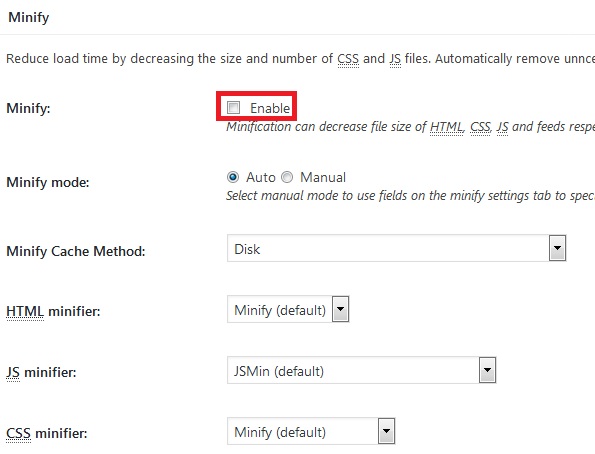
3. Minify – Disable
Disable this option for now because you’re going to use the one available in the Component #2 later instead. The rest can left untouched.
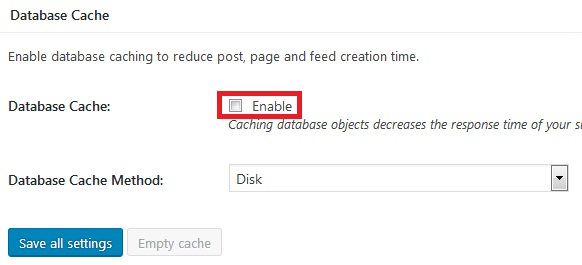
4. Database Cache – Disable
The database contains storage your websites data such as posts, pages and configuration files. Database cache by right can improve database performance.
However, it has negative effect if you’re using shared hosting plan. It slows down your site instead. So “Disable” is a better option in this scenario.
But if you’re using VPS or dedicated server plan, you can enable it.
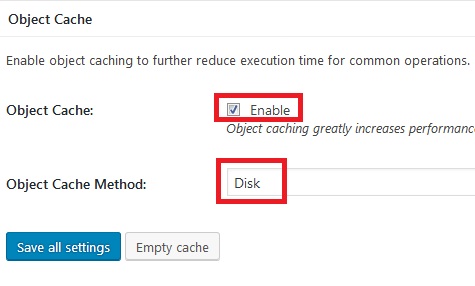
5. Object Cache – Enable
This entity does has the benefits to increase site’s performance. So just go “Enable” Object Cache and select “Disk” as the Method.
However, it does has the potential of not working well with shared hosting environment. If you noticed your WordPress dashboard is having sluggishness, then you should come back and disable it later.
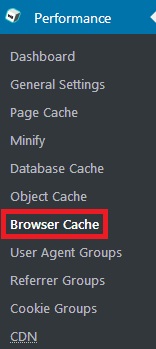
6. Browser Cache – Enable
Browser cache helps reduce server load by leveraging the cache available in your site visitor’s web browser, thus would give a better loading speed.
You should “Enable” this great option.

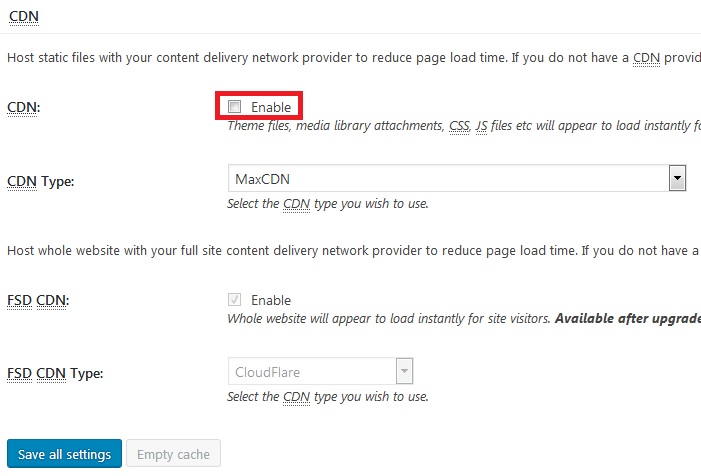
7. CDN – Disable
Leave the CDN as “Disable” because here is not right place to configure it. I’ll guide you through the whole process later on the CDN.
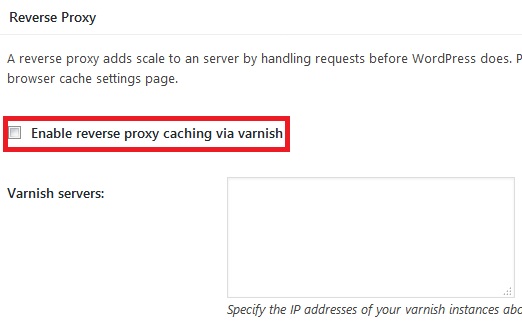
8. Reverse Proxy – Disable
Reverse proxy requires advance setup and private hosting. You don’t need that. So, just “Disable” this option.
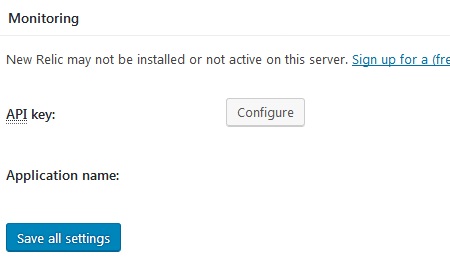
9. Monitoring – Ignore
You don’t need to use this feature. So, just simply ignore “Monitoring” part.
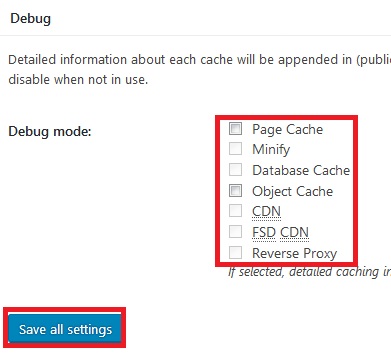
10. Debug – Disable
This option is only for those actively debugging their site. Most likely you’re not going to debug all the time, so “Disable” all the options in the list.
As this is the last step you’re going to perform in the “General Settings”, please click “Save all settings” button so that all changes done so far would be saved.
You’ll notice from your General Settings that there are some additional options that I’m not mentioning. Those you can safely ignore.
Step #3: Configure Page Cache
Move on to the Page Cache settings. Here you’ll configure it in more detailed manner. I’ll go through the important sections you need to pay attention to. Those not mentioned means you can leave them as default settings.
1. General
For the “General” section, make sure you “tick” the boxes for the following items:
- Cache front page
- Cache feeds
- Cache SSL
- Don’t cache page for logged in users
The rest you can leave them unticked.

2. Cache Preload
Update this section with the following values accordingly:
Automatically prime the page cache: Ticked
Update interval: 900 seconds
Pages per interval: 10
Sitemap URL: If you have one (Usually is “yourdomain.com/sitemap.xml”)
Preload the post cache upon publish events: Ticked
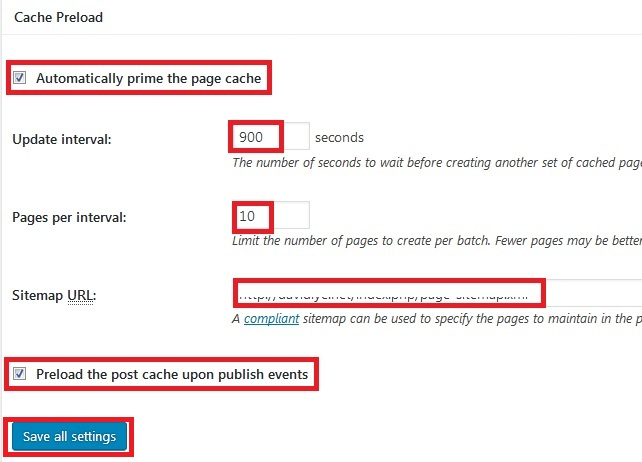
This is the final thing you’ll need to do inside Page Cache. So do press “Save all settings”.
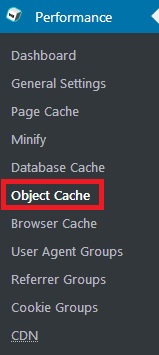
Step #4: Configure Object Cache
As you don’t enabled Minify and Database Cache in General Settings, not need to perform further configuration on them, can skip right away to Object Cache settings.
Leave everything here as defaults setting, except you need to make sure the value for these 2 items are correct:
- Default lifetime of cache object: 180
- Garbage collection interval: 3600

Step #5: Configure Browser Cache
Move to Browser Cache settings.
1. General
Under this section, make sure that the boxes for first 6 items are “ticked”:
- Set Last-Modified header: Ticked
- Set expires header: Ticked
- Set cache control header: Ticked
- Set entity tag (ETag): Ticked
- Set W3 Total Cache header: Ticked
- Enable HTTP (gzip) compression: Ticked
You can leave other items under “General” unticked.
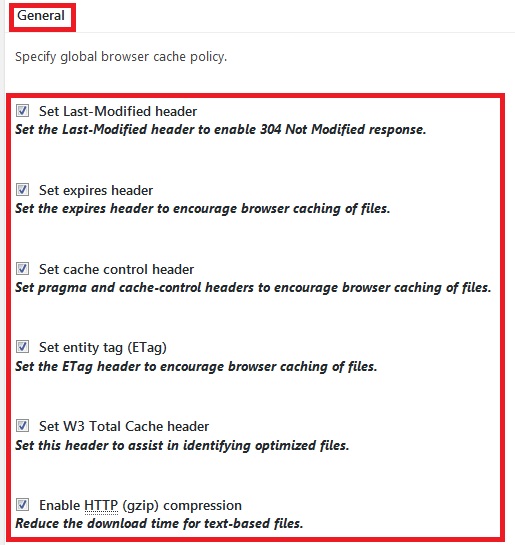
Just leave other sections in Browser Cache as defaults.
Step 6: Configure Extension
Go to “Extensions” setting. Here is the last thing you need to configure under “Performance” menu list. Proceed to “Activate” Cloudflare.
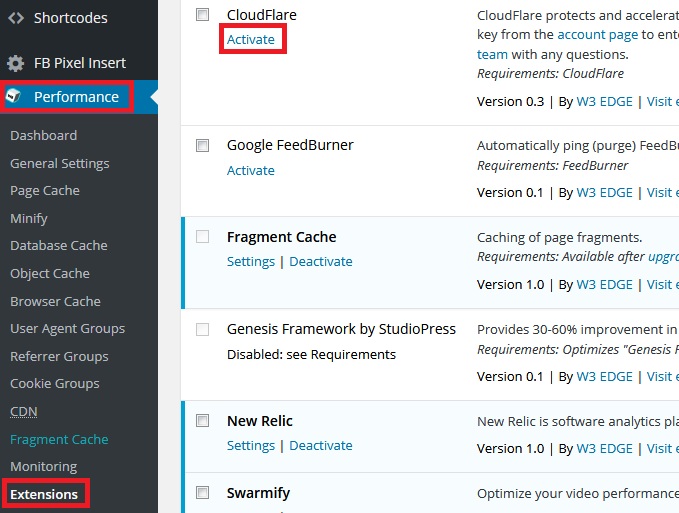
You’re done now for Component #1.
It’s time to move on to Component #2.
Component #2: CDN
You may be asking what is CDN? CDN is actually a simplified name for Content Delivery Network. It is a collection of proxy servers geographically located across the whole world that helps deliver contents from your hosting server to your website visitors.
As CDN has servers presence in most major parts of the world, it would serve the contents much faster compared to just having hosting server which located in a single/few locations only.

With CDN, when there is people visiting your website, the CDN server nearest to the visitor location would be the one that’s going to help deliver the contents. It cuts short the travel distance time for the contents to your website visitors.
Without CDN, when there is people visiting your website, regardless of the visitor location, the contents from your hosting server will be delivered. So if the website visitor is located far away from the hosting server location, the loading time is going to take longer.
If you’re serious about supercharging your website speed, Content Delivery Network is something cannot be neglected.
Content Delivery Network is not meant to replace hosting server though.
You still need your hosting server to host all your websites files and configurations…
…as CDN only store chunks of contents from your hosting to reduce the main server response time.
There are many Content Delivery Network available out in the market…
…such as Akamai, MaxCDN and Cloudflare, just to name a few.
Most of them requires you to pay for using their service.
However, I have a good news to you. There is a free CDN you can use to supercharge your WordPress site – It is none other than Cloudflare.
How To Set Up And Configure Cloudflare?
Step #1: Getting Your Cloudflare Account Ready
Let’s go to create an account in Cloudflare website. This is the place where you can configure the settings for the CDN to work for your site.
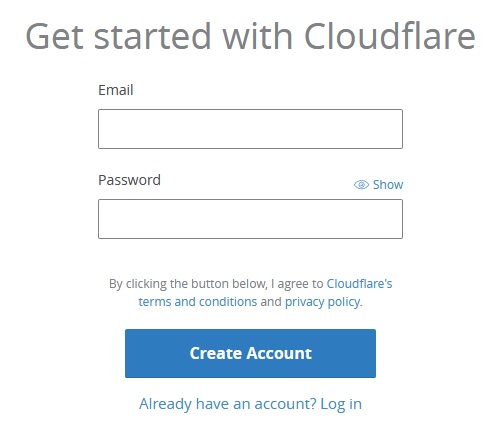
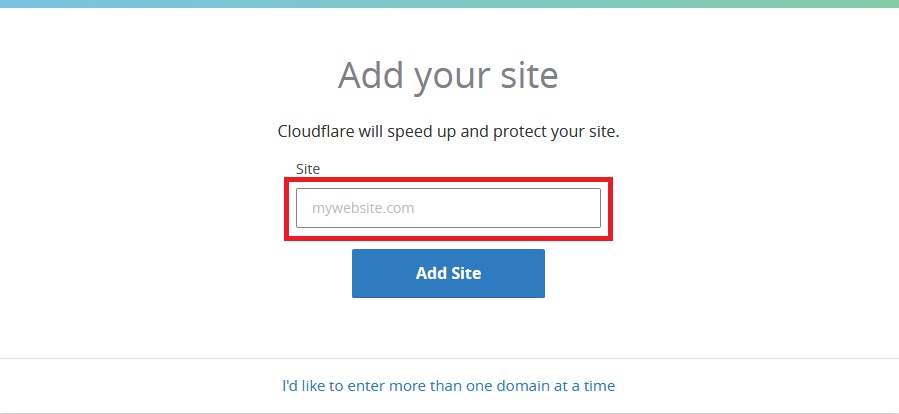
After you’ve successfully created your account, the platform is going to ask you to enter your website. Proceed to key-in the domain name of your website and hit the button “Add Site”.
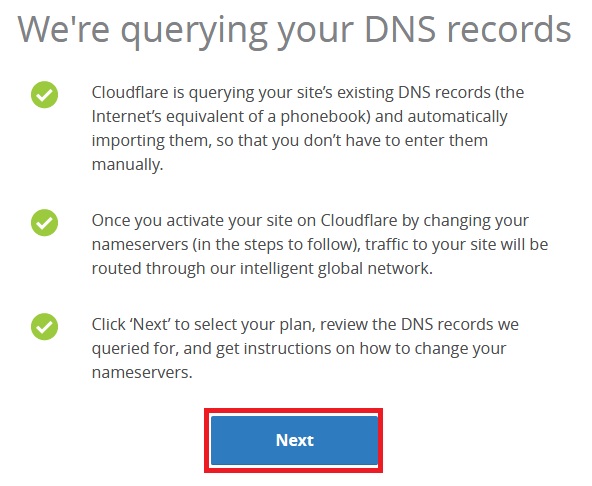
You’ll be shown the status that Cloudflare is querying your DNS records. Just press the “Next” button.
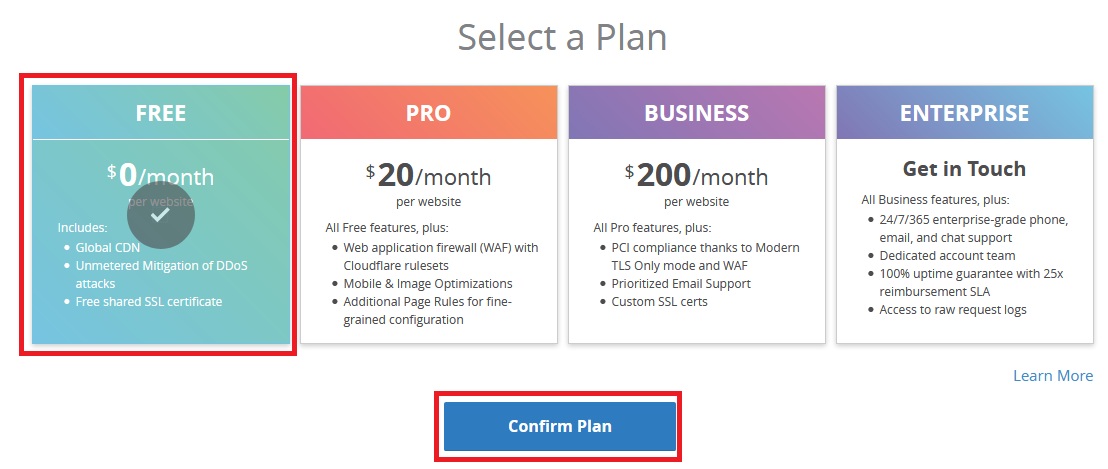
Step #2: Choose Your Desired Plan
You’ll be presented with a series of plan available by Cloudflare. As your intention is to supercharge your website speed for free with the CDN capability, so you can just choose the “FREE” plan. It’s more than enough to see big improvement in the loading time.
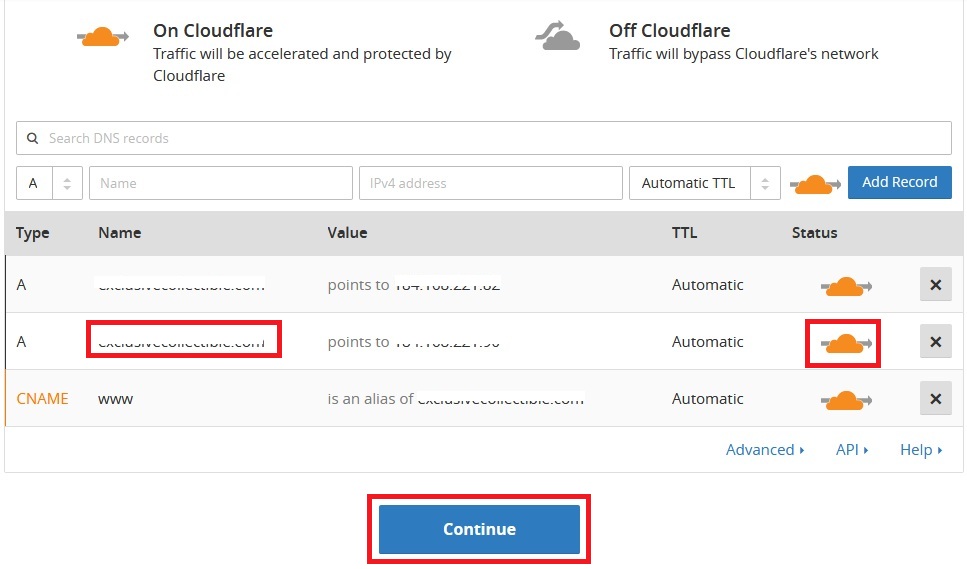
Step #3: Verify DNS Records
Here you’re required to verify your DNS records. All you need to do is make sure the orange Cloudflare symbol is visible next to your domain name. This indicates everything is fine and Cloudflare will accelerate the traffic for that domain. Proceed with the “Continue” button.
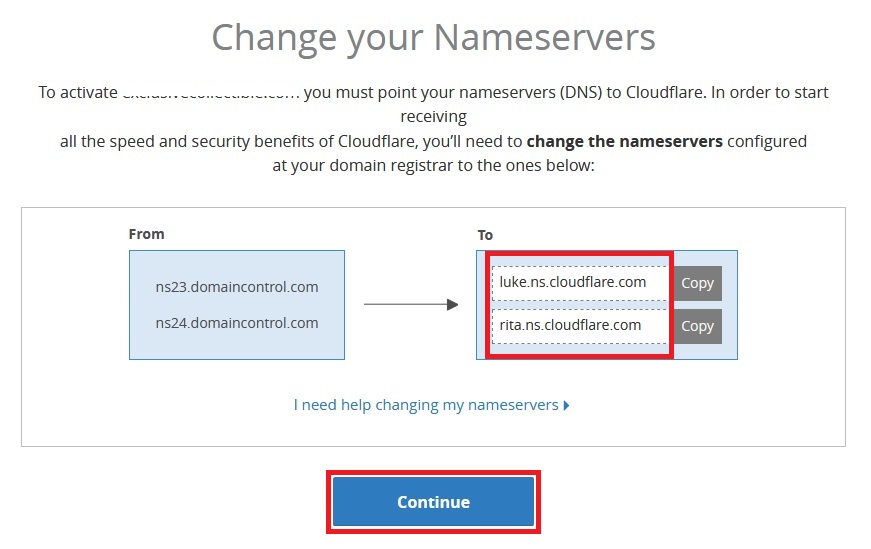
Step #4: Change Your Nameservers
Cloudflare provides 2 new nameservers for you to update inside your domain name registrar account. To do this, you may refer to the quick guide provided by these famous registrar companies: GoDaddy or NameCheap if your domain name is from either one of them.
If your domain is from other companies, you may contact their support team for help if you’re not sure how to update to the new nameservers.
Note: The changes might need up to 48 hours to take effect. So don’t expect your website speed improve immediately.
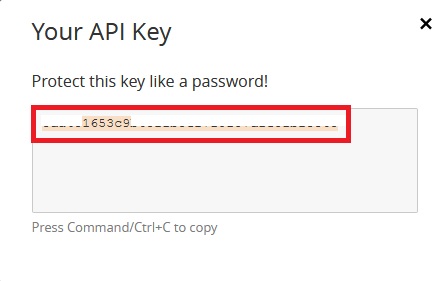
Step #5: Get API Key From CloudFlare
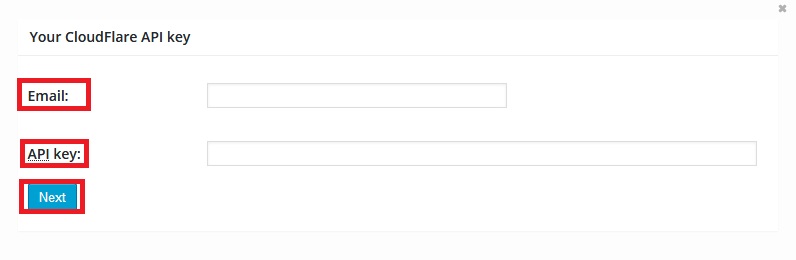
In your Cloudflare account, go to “My Profile” from the drop-down menu at top right corner. Then scroll down to the bottom page and press the “View API Key” for Global API Key.
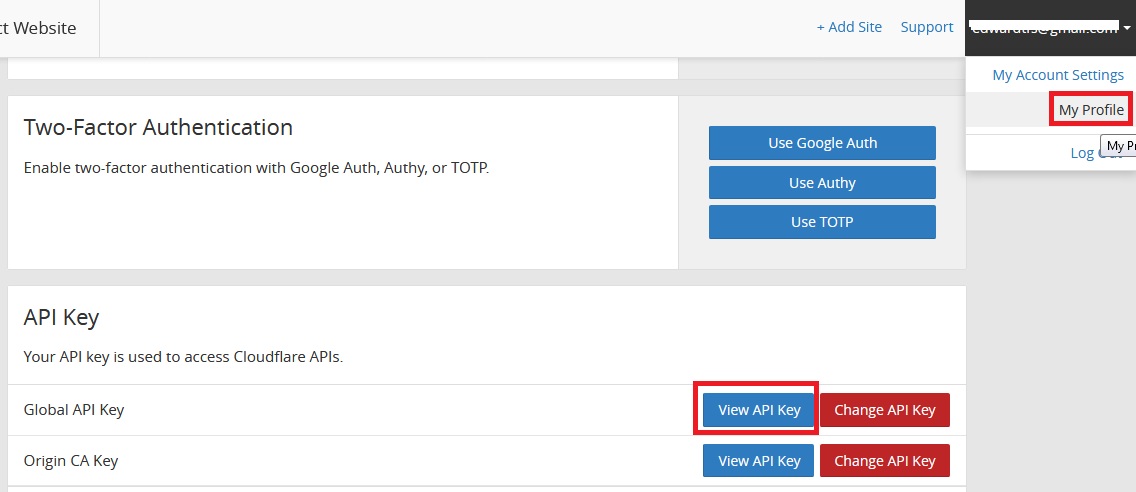
Copy your API Key.
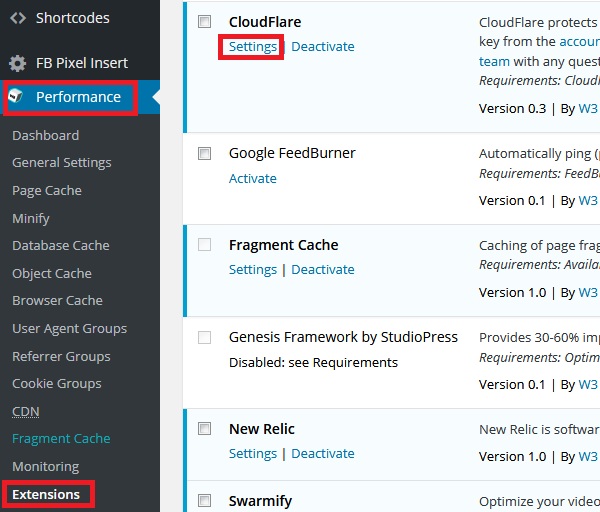
Step #6: Sync Cloudflare With W3 Total Cache
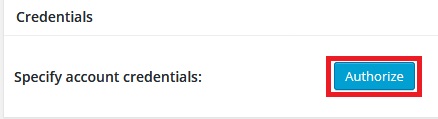
In your WordPress dashboard, go to Performance -> Extensions and proceed to “Settings” under CloudFlare.
Under Credentials, press “Authorize” button.
Enter your Cloudflare login email address and API Key. Press “Next” to save your details and you’ll see additional settings.
Step #7: Turn On Cloudflare Minify
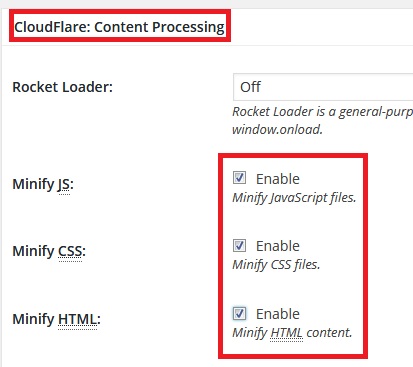
This is last thing you’ll be required to do. Just scroll down to look for Cloudflare: Content Processing and enable the three “Minify” options.
Well done, you’ve completed all the set up and you should have big improvements in your website speed.
Pheww….I know it’s a long and pain process but you just need to do only once and you’ll gain the benefits forever. It’s a good return, right?
Do leave your comment below and let me know if this post is useful for you.

Been looking forward to make my website speed faster. Great tips.
Hope you can make your website faster with the tips 🙂
Great discovery. Can’t wait to use on my wordpress.
Waiting for good news from you soon 🙂
Hi, David. You have given a very intensive guide to speed up WordPress website speed. Thanks for your effort.
Thanks, Steven for your comment 🙂