How To Link Website Domain Name Email To Gmail Account?

Now that you have own website domain email created already, it’s not necessary to login to your webmail account to read email.
There is a better and smarter option for you to read your website domain emails. It is by linking it to your regular Gmail account.
This setup not only allows you to receive website domain incoming emails but also gives you flexibility to send email out branded with your domain in Gmail.
By having the access to your branded domain email with Gmail account, you can better manage your emails now.
In today’s post, I’m going to bring you through the step-by-step process on how to link your website domain email to your Gmail account.
Ready for good stuff?
Great, let’s jump into the steps now….
1) Access Your Web Hosting cPanel
First, login to your web hosting cPanel with the login details provided by your hosting company.
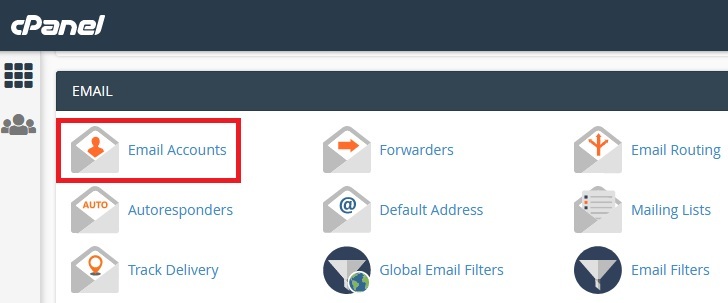
Then scroll down until you see “EMAIL” section.
Click on the “Email Accounts”.
2) Set Up Mail Client
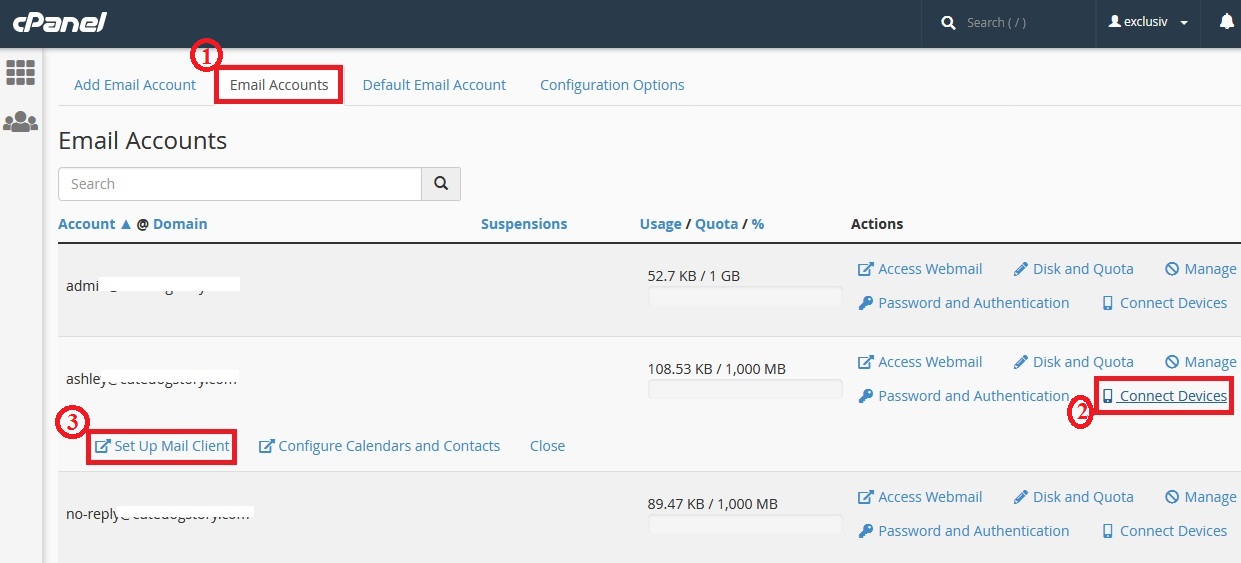
Go to “Email Accounts” tab.
Choose the email address that you want to link with your Gmail account.
Click “Connect Devices” followed by “Set Up Mail Client”.
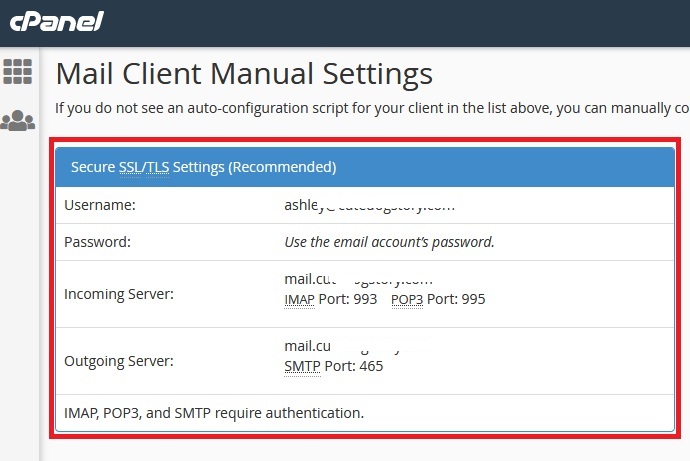
A new page named “Set Up Mail Client” would appear.
Scroll down until you see the “Mail Client Manual Settings”. Take note of the information in the “Secure SSL/TLS Settings (Recommended)” section.
You’ll need to key-in the information into Gmail account settings later.
3) Access Gmail Account Settings
Login to your Gmail account that you want to use for receiving your brand domain emails.
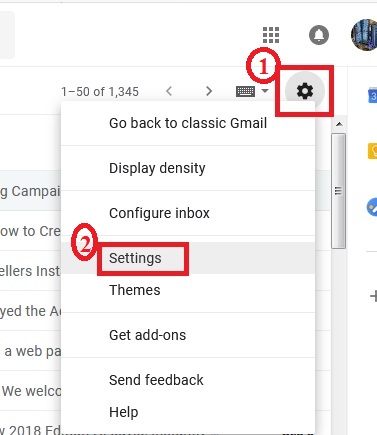
Click on the “Gear” button located second row at the top right corner.
Then, choose “Settings” from the options presented.
4) Link Website Domain Email To Your Gmail
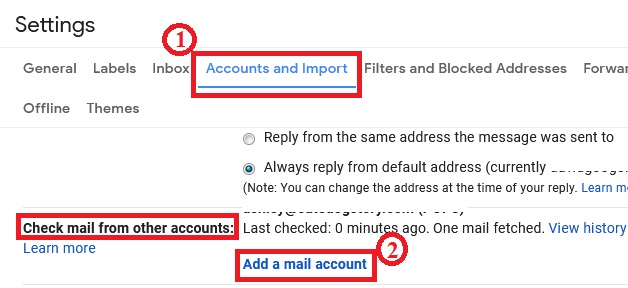
Inside your Gmail’s settings page, go to “Accounts and Import” tab.
Scroll down and look for the section called “Check mail from other accounts”.
Click “Add a mail account” option.
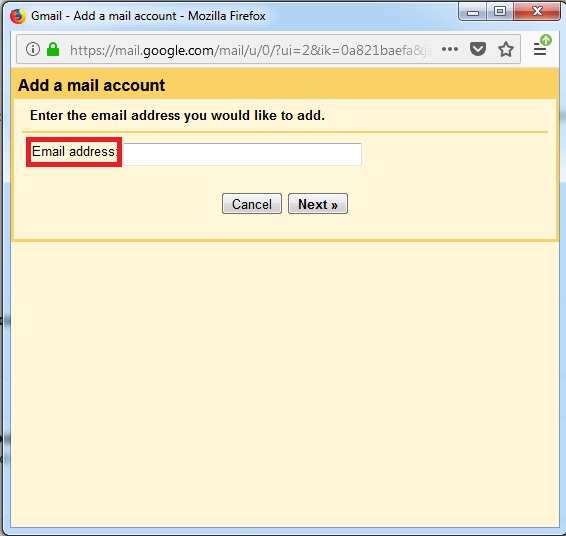
Enter your website domain email address that you want to add into your Gmail account.
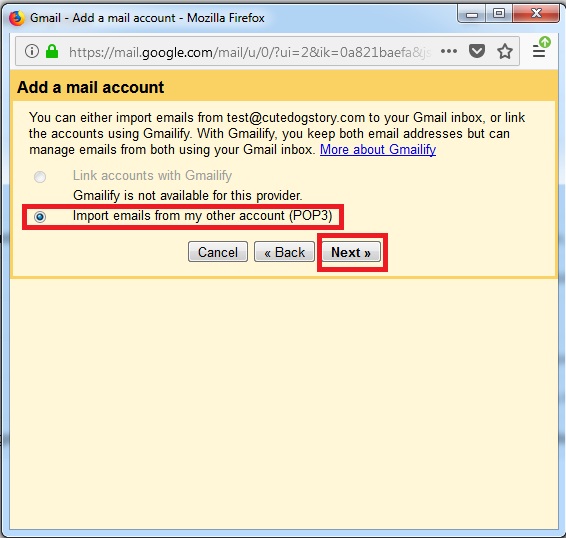
Choose “Import emails from my other account (POP3)”. Click “Next” button.
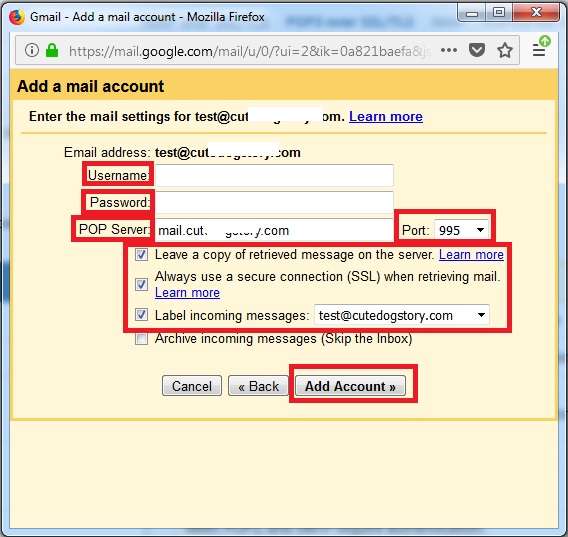
Now there are several things you need to fill up. Make sure you key-in the information correctly.
- Username: Enter based on the username shown in step 2 just now of “Mail Client Manual Settings” in web hosting cPanel.
- Password: Enter your domain name email password which you’ve created when setting up the email account.
- Pop Server: Enter the “Incoming Server” shown in step 2 just now of “Mail Client Manual Settings” in web hosting cPanel.
- Port: Choose “995” which is the POP3 Port shown in step 2 just now of “Mail Client Manual Settings” in web hosting cPanel.
Make sure the following 3 options are ticked:
- Leave a copy of retrieved message on the server: Ticked
- Always use a secure connection (SSL) when retrieving mail: Ticked
- Label incoming messages: Ticked
Then click “Add Account” button.
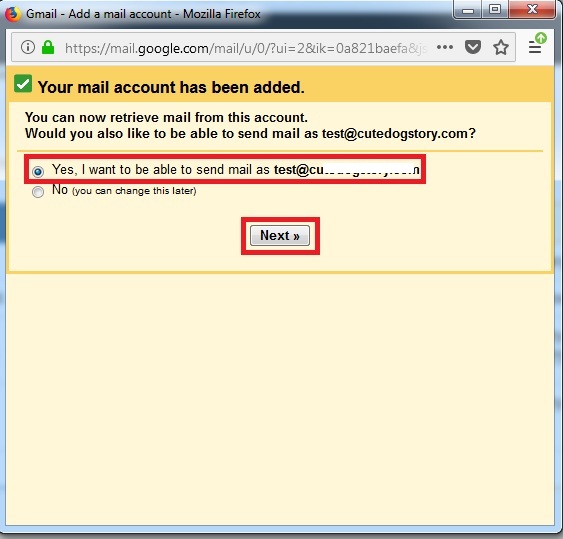
Now choose “Yes, I want to be able to send mail as” and click “Next”.
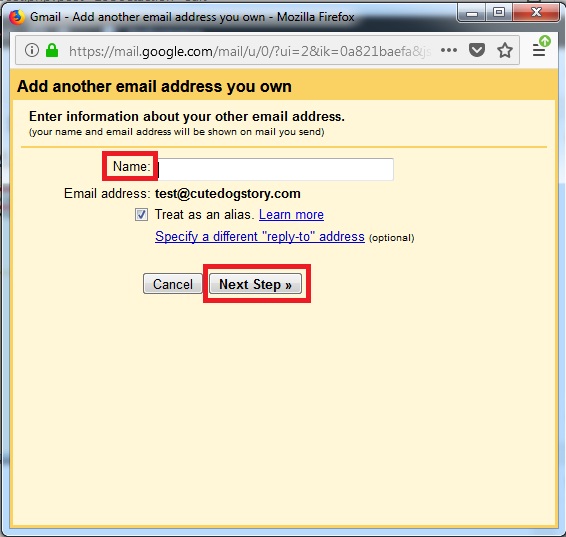
Enter the name you want people to see when receiving the email you sent. Click “Next Step”.
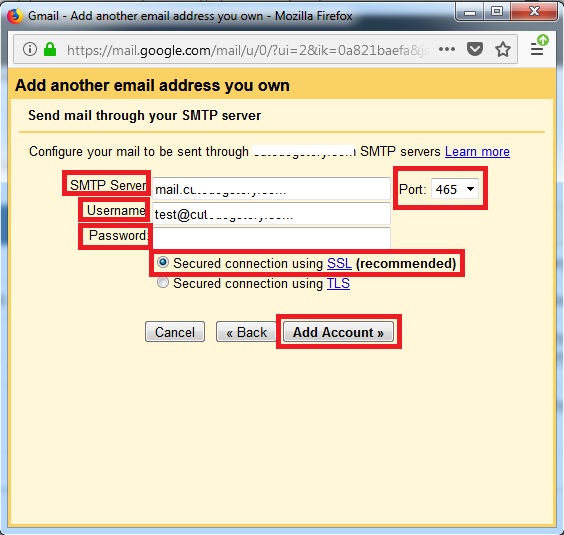
Here you’ll need to fill up some information regarding your SMTP settings for sending email out. Make sure you key-in correctly.
- SMTP Server: Enter based on the “Outgoing Server” shown in step 2 just now of “Mail Client Manual Settings” in web hosting cPanel.
- Port: Choose “465” which is the SMTP Port shown in step 2 just now of “Mail Client Manual Settings” in web hosting cPanel.
- Username: Enter based on the username shown in step 2 just now of “Mail Client Manual Settings” in web hosting cPanel.
- Password: Enter your domain name email password which you’ve created when setting up the email account.
Choose the option “Secured connection using SSL (Recommended)”. Then click “Add Account”.
Now a verification code will be sent by Gmail Team to your domain name email address that you’ve have just tried to link.
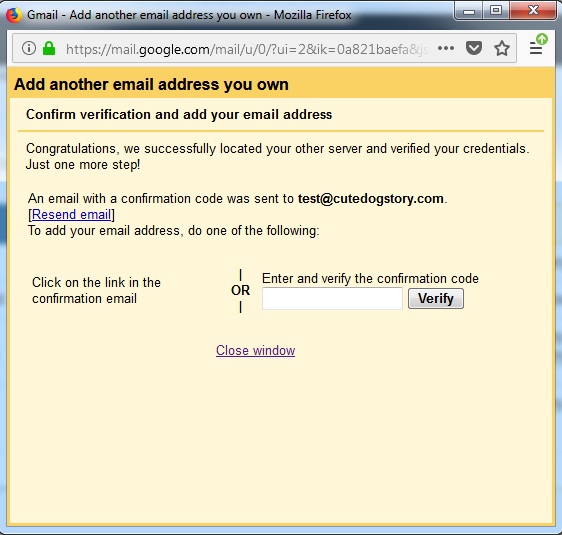
You need to open up your webmail in cPanel for the email address to get the verification code.

Find the email from Gmail Team with the subject line “Gmail Confirmation”.
Open the email and you’re going to see your “Confirmation code”.
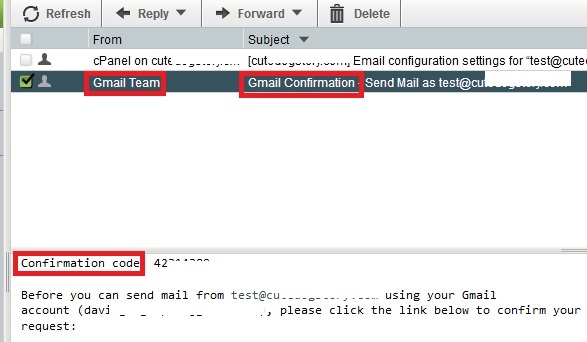
Copy and paste the code into your Gmail verification window just now and click on the “Verify” button.
Well done…
You’ve successfully linking your domain name email with your Gmail. You’re now can send and receive your company emails using your Gmail account.
Bonus Tips
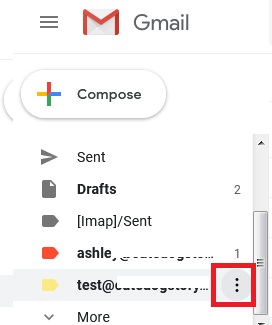
You can put a color label for your domain name email address in Gmail so that you can easily differentiate it from your normal Gmail email address in inbox when receiving emails.
To do this, go to your domain name email address located on the left side of your Gmail account (must use computer to do this). Move the mouse curse towards the end of your email address and click on the 3 tiny dots that appear.
Move your mouse cursor to the “Label color” and you’ll see a wide range of colors you can choose from. A good rule of thumb is to choose striking color so that you can see those emails easily for domain name email address.
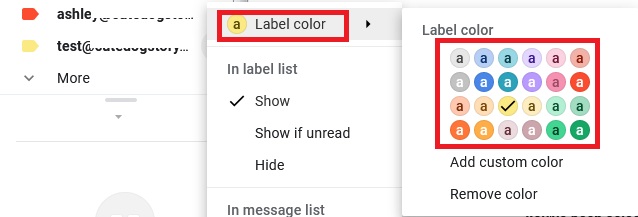
Now every time whenever you received emails to your domain name email address, you’ll see the color label you’ve selected appear in your Gmail inbox.

If you find this post helpful, please let me know in the comments below.

