Using GetResponse To Create Email Autoresponder Series

Create email autoresponder series is an important part towards your email marketing journey. This is so that you could connect with your subscribers right from the moment when they choose to be in your list.
Your subscribers would receive your emails automatically based on which day you want your pre-written emails to be sent out to them after they’ve opted in.
Having an email autoresponder series is going to help you warm up your subscribers towards you and your business.
And the best part is you only need to write those emails once and then your email marketing system would do the email sending work on autopilot.
Today I’m going to walk you through the process of creating email autoresponder series using GetResponse.
How To Create Email Autoresponder Series Using GetResponse
Login to your GetResponse account if you already one. If you don’t have one, you can try it today with a 30 Days Free Trial.
Once you’re inside the dashboard, click on “Email Marketing” at the top section.

Now proceed to clicking on “Autoresponders” at the top.

There are 2 things you have to get it done here. Firstly, click on the “9 Tiny Dots” so that the view would change to the schedule form in terms of days. Secondly, you need to choose the list you want your email autoresponder to be in.

Here you’re going to see the layout in numbers. These numbers represent how many days your subscribers have been in your list and what email you want to be sent out.
For example, if you write email on number 2, your future subscribers would receive your email automatically on the day 2 after they’ve subscribed to your list.
So to start creating your autoresponder email, click on the day you want your subscribers to receive this email after they’re on your mailing list.

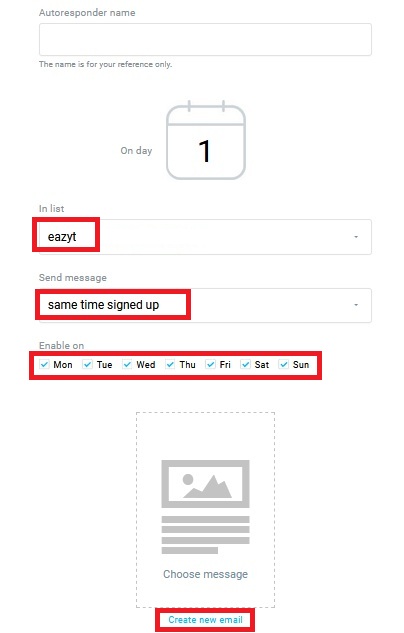
A new page would appear with numerous options. Don’t be overwhelmed by it. Just take it easy. For the “Autoresponder name”, you can leave it blank as for now.
Just make sure “In list” is showing the correct list you want your email to be sent to. If incorrect, you can click on the dropdown menu and choose the right one.
Usually I just leave “Send message” as “same time signed up”. However, you can choose other options based on your own preferences.
It is recommended to “Enable on” all Monday to Sunday so that your email can be sent out everyday when there are new subscribers who fulfill the number of days in your list.
Finally, on this page, click “Create new email”.
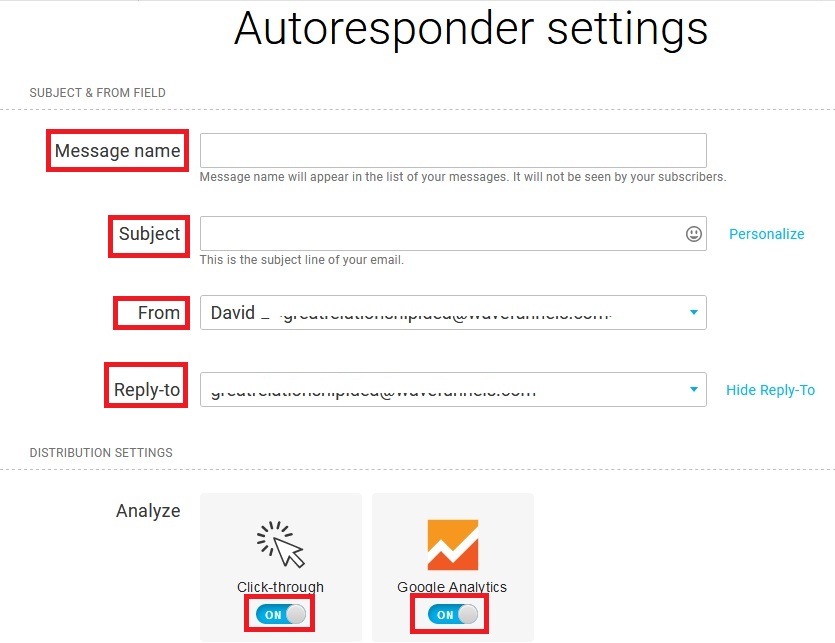
Now you’re going to see the “Autoresponder settings”. Some of the things you enter and choose here would reflect in your email that you want to send out.
- Subject – Enter the email title you want your subscribers to see when they receive your email in their mailbox.
- Message name – This is for your own record only. You can just copy and paste from your Subject field.
- From – Your subscribers able to see the email is coming from who and what email address.
- Reply-to – Choose the email address where you can receive reply from your subscribers.
- Click-through & Google Analytics (Under Distribution Settings) – Turn them on so that you can know your email performance inside GetResponse.
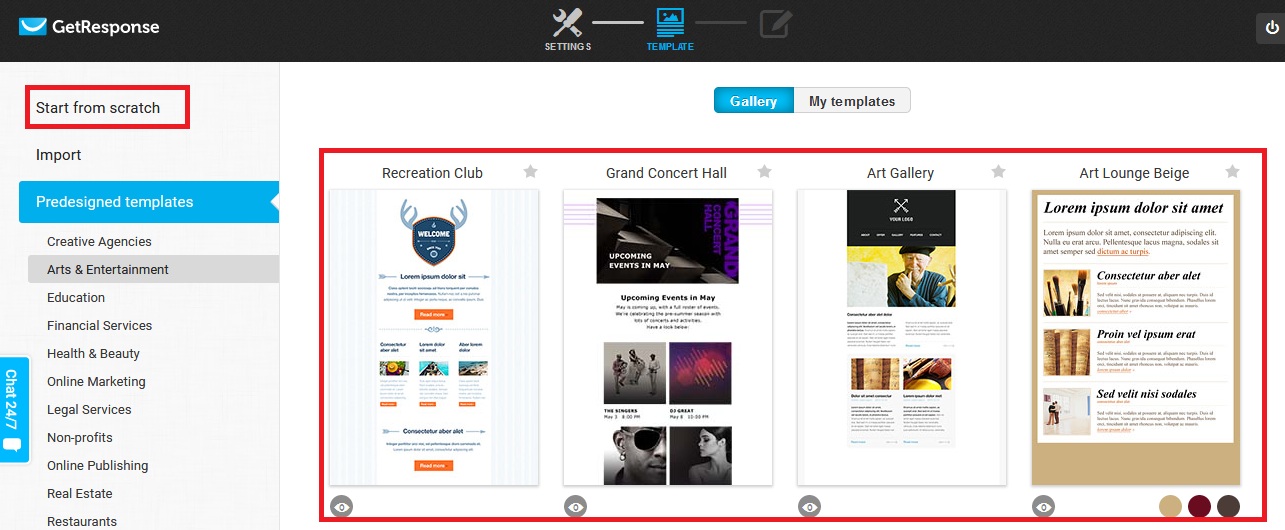
You can choose the email layout template from the choices given or you can just start from scratch.
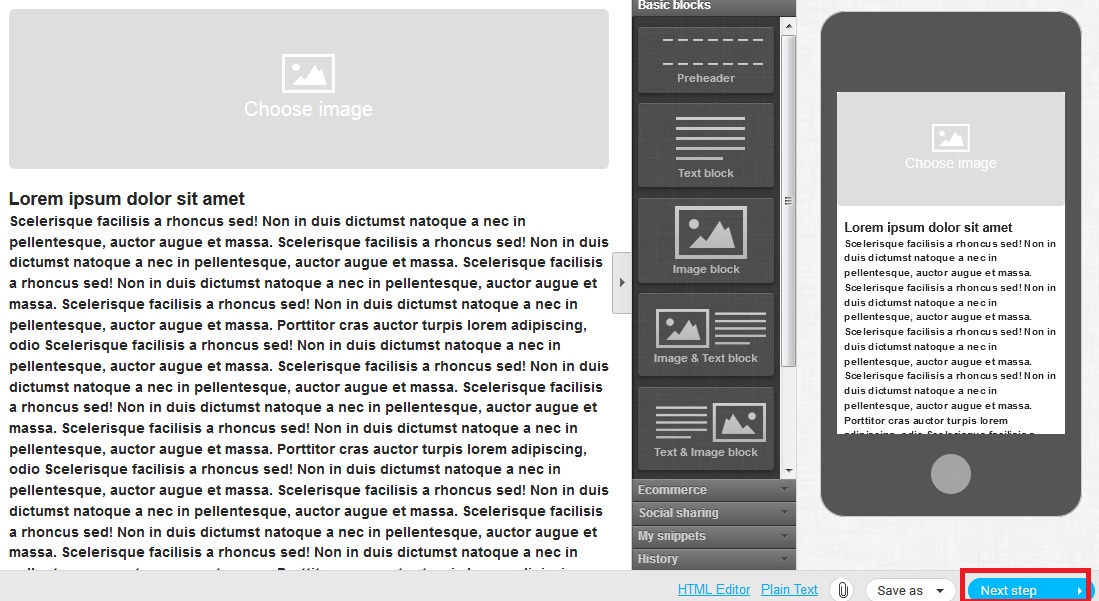
Write the email content you want your subscribers to receive automatically on a specific day after they subscribed to your mailing list.
After done writing, click the “Next step”.
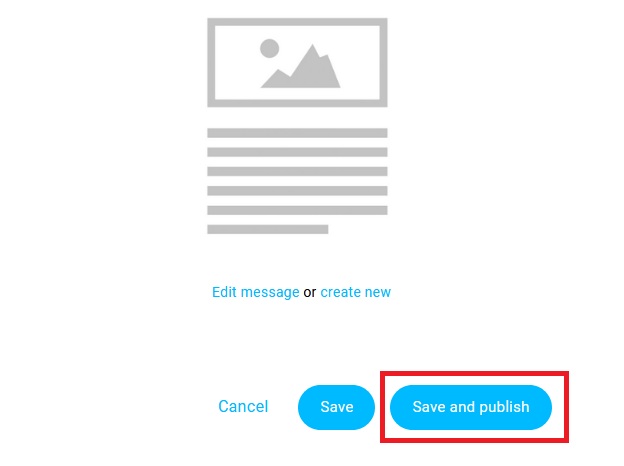
You have come to the last step. At the bottom of the page here click “Save and publish”.
Now you would see your email with the subject line appear on a particular day you set earlier inside the Autoresponder schedule.
Congratulations. You have just successfully created your email autoresponder.
You can repeat the same process to create different emails on different days you want your subscribers to receive on autopilot after they subscribed to your mailing list.

Below is a bonus for you – the Infographic of “How To Use Email Autoresponders”.

